ImageMagic scripts to scale graphics for different Android screens
Battlefield is the screen players will see all the time. At first I thought about building it from tiles, but I changed my mind. It's going to be fullscreen graphics, in all it's HD glory. I found some free wood, sand and stone textures and played with them in Gimp for almost two days now. Here's the end result:
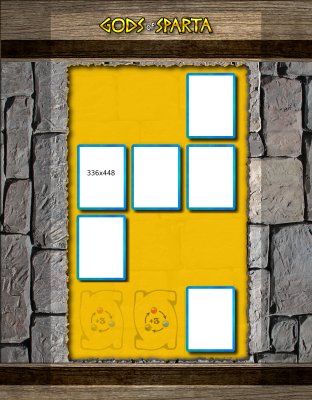
Looks kind of lame on this thumbnail size, but I assure you it's much better on an Android device. The shaded part is the background used to fill the space on wider devices. It isn't really shaded in the actual file.
I created this screen at 2134x2733 pixels, so that it covers all possible Android devices. Now, I need to scale it to sizes appropriate for 800, 1024, 1280, 1536 and 1920 screens. To avoid doing this manually, I created a simple script that calls the imagemagick tool to do the scaling. Here's the script:
#!/bin/bash
convert images/2560/$1 -resize 31.25% images/800/$1
convert images/2560/$1 -resize 37.5%  -gravity center -crop 1024x1024+0+0 +repage images/1024/$1
convert images/2560/$1 -resize 50%    images/1280/$1
convert images/2560/$1 -resize 60%    images/1536/$1
convert images/2560/$1 -resize 75%    -gravity center -crop 2048x2048+0+0 +repage images/1920/$1
You need to create directories named 800, 1024, 1280, 1536 and 1920. You should create all images in directory named 2560 and then just run the script to create the others:
./generate.sh background.png
If you don't like the default blurry edges, you can use -adaptive-resize instead of just -resize. The difference is similar to using Cubic vs Lanczos algorithm when scaling in Gimp.
I guess I should explain the gravity/crop/repage options. To ensure that the large images load on devices with less RAM or older graphics cards, I'm making sure that the whole background image can fit into one texture. On older devices, textures are limited to 1024x1024 pixels. Then there's a middle ground of 2048x2048 pixels and the newest devices that support 4096x4096 pixel textures. If the device screen is less than 1024x1024 it's a safe bet to allow 1024x1024 pixel textures on it.
The resize script sometimes overflows the texture size but a pixel or two. For example, 2733x2134 picture would be resized to 1025x800 or similar. To work around that, we simply crop the image to 1024x800, or whatever is the maximum allowed texture size. We crop using the center of the image, thus the -gravity option. By default, imagemagick script would create multiple files in this case, and we only want one. That's why +0+0 and +repage are needed. Those options simply discard the second file.
To create the texture atlases, I use the following code in libGDX:
Settings settings1024 = new Settings();
settings1024.minHeight = 1024;
settings1024.minWidth = 1024;
settings1024.maxWidth = 1024;
settings1024.maxHeight = 1024;
settings1024.paddingX = 0;
settings1024.paddingY = 0;
settings1024.combineSubdirectories = true;

Settings settings2048 = new Settings();
settings2048.minHeight = 1024;
settings2048.minWidth = 1024;
settings2048.maxWidth = 2048;
settings2048.maxHeight = 2048;
settings2048.paddingX = 0;
settings2048.paddingY = 0;
settings2048.combineSubdirectories = true;

Settings settings4096 = new Settings();
settings4096.minHeight = 1024;
settings4096.minWidth = 1024;
settings4096.maxWidth = 4096;
settings4096.maxHeight = 4096;
settings4096.paddingX = 0;
settings4096.paddingY = 0;
settings4096.combineSubdirectories = true;

TexturePacker2.process(settings1024, "../images/800", "../GoS-android/assets", "800");
TexturePacker2.process(settings1024, "../images/1024", "../GoS-android/assets", "1024");

TexturePacker2.process(settings2048, "../images/1280", "../GoS-android/assets", "1280");
TexturePacker2.process(settings2048, "../images/1536", "../GoS-android/assets", "1536");
TexturePacker2.process(settings2048, "../images/1920", "../GoS-android/assets", "1920");

TexturePacker2.process(settings4096, "../images/2560", "../GoS-android/assets", "2560");
Note how the different texture size is used depending on the device screen resolution. I placed this code in main() function of Main() class of the desktop version of the game. I keep it commented out until I change the graphics.
Important note: the default TexturePacker settings use the 2px padding to avoid any artifacts when your graphics have semi-transparent pixels on the edges (alpha between 0 and 1). I noticed those artifacts in my Drone Invaders game where I did not use the texture packer. When a moon gets rotated, sometimes a few orange dots would show up.
The code above sets the padding to zero to allow 1024 and 2048 pixel backgrounds to fit into a single texture. I recommend using this code for backgrounds and other rectangular graphics. For the rest, there are two options:
- create a separate set of directories and settings
- add 2-pixel transparent border to all the graphics
The first one complicates the loading code a little bit. The second one is easier, but you have to account for those 2 pixels whenever you want to position something on the screen at the exact coordinates. Both approaches work if you start to do it from the beginning, so just pick one and stick with it all the time.
read more... Tweet to @bigosaur Tweet Bigosaur, 2014-10-06